DIY Van Plumbing: How to Build a Simple Water System
Building a mobile home offers freedom on the open road. Fresh water in your van feels like a luxury, but clean water is a basic necessity. A reliable van plumbing system ensures comfortable living during your travels. Your sink will drain properly, and the shower will deliver warm water with good pressure. Many DIYers create a functional setup using common materials from any hardware store. The system involves several parts working together to move water from a fresh tank to your fixtures. You can easily install a water pump, PEX tubing, and a gray water tank with basic tools. Understanding each step helps you build a robust, leak-free system. We break down the process into manageable actions.
1. Compact Gravity Feed Setup
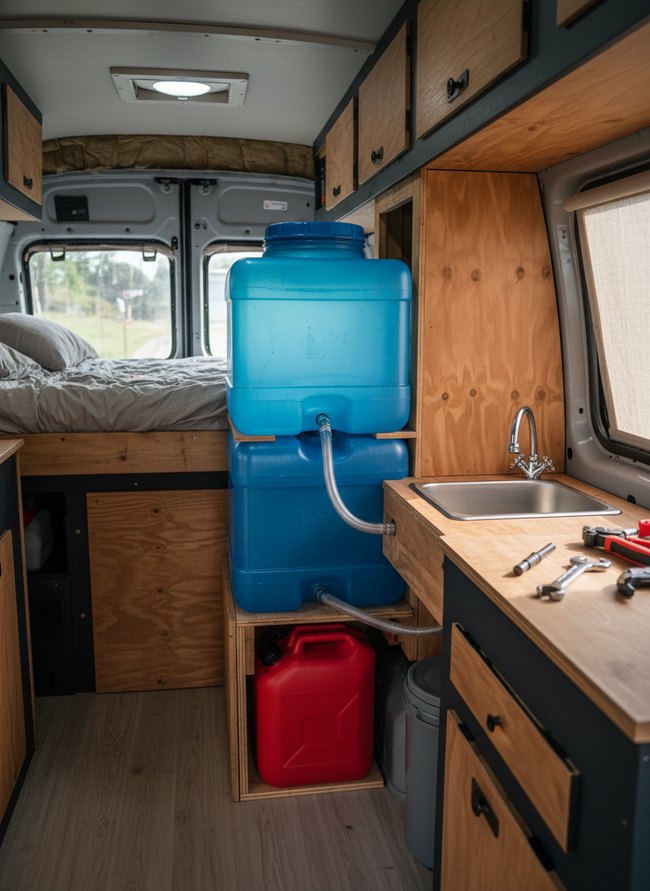
Two bright blue water containers form the core of the simple van plumbing system. A shiny silver faucet draws water from the top container, draining into a stainless steel sink. The setup provides functional water without complex pumps.
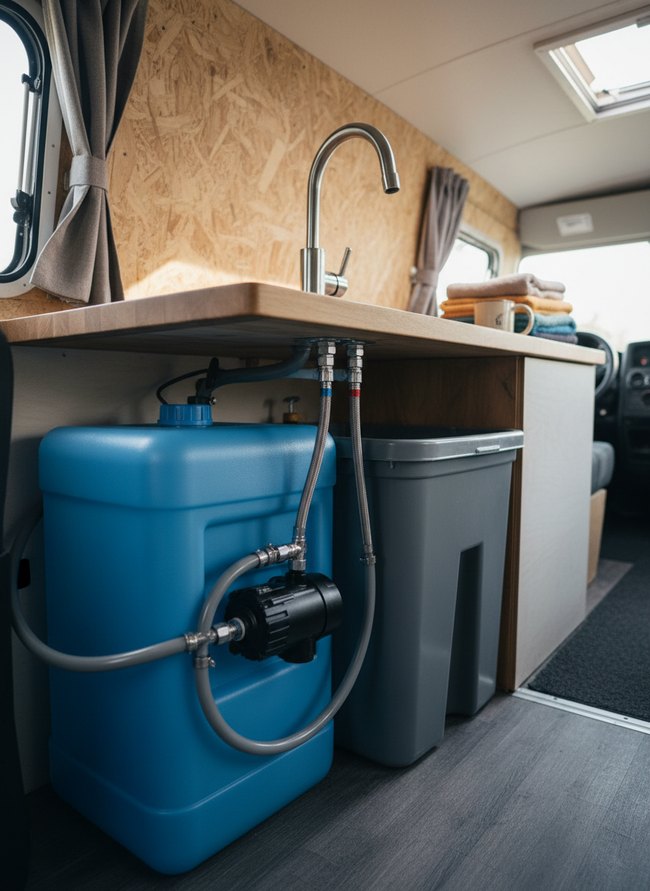
2. Under-Sink Pressurized System
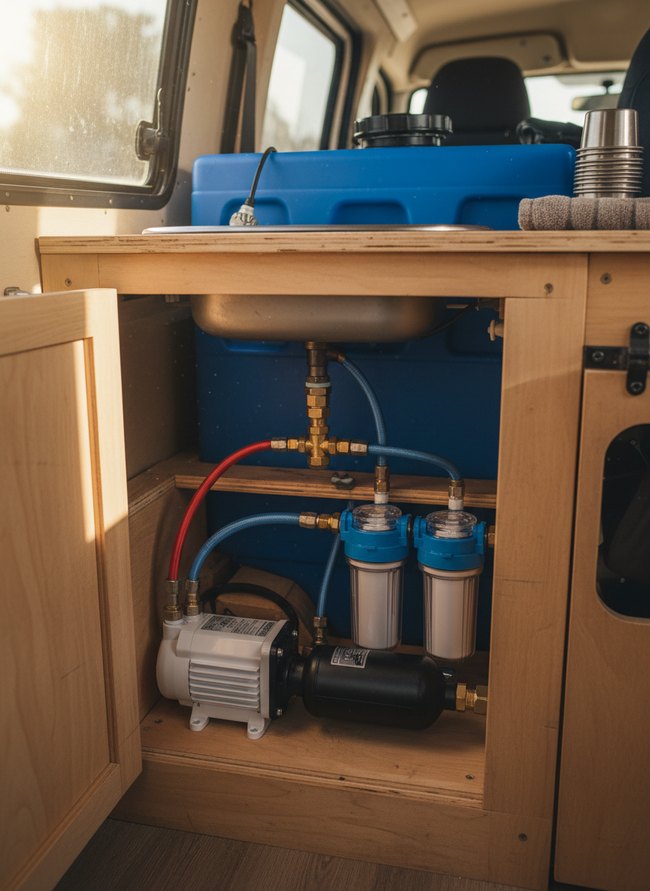
A stainless steel sink sits snugly above a blue water tank, forming the core of the compact van plumbing system. Brass fittings connect clear water filters and flexible blue hoses, showing a well-organized setup. Van owners can adapt the space-saving layout for their own small vehicle.
3. Outdoor Shower Integration
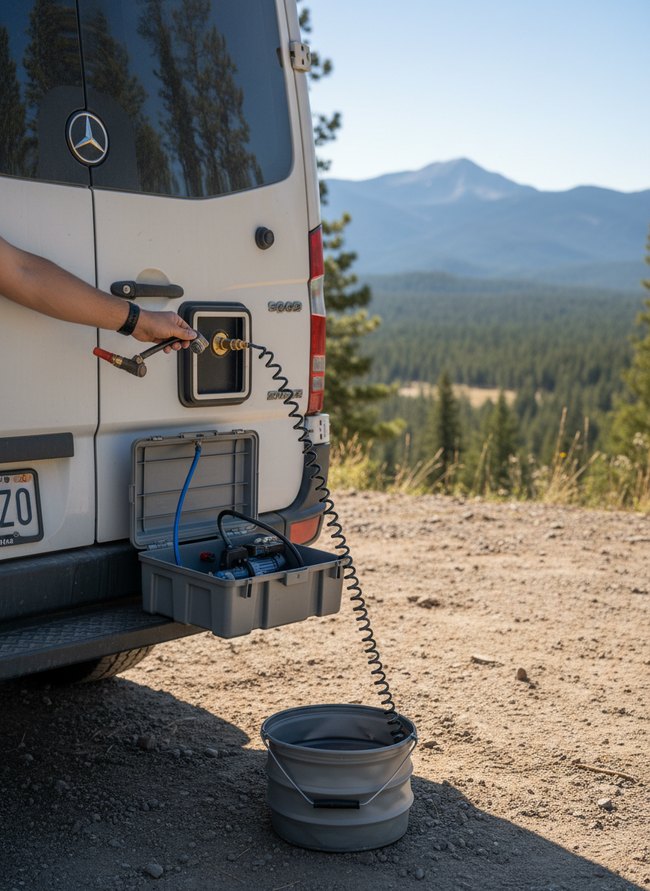
A hand connects a black coiled hose to the white van’s brass quick-connect fitting, part of a functional van plumbing system. A gray plastic case holds the water pump and blue tubing, sitting open on the van’s rear bumper. Van owners can easily adapt a similar setup for their own outdoor shower needs.
4. Freshwater Tank Installation
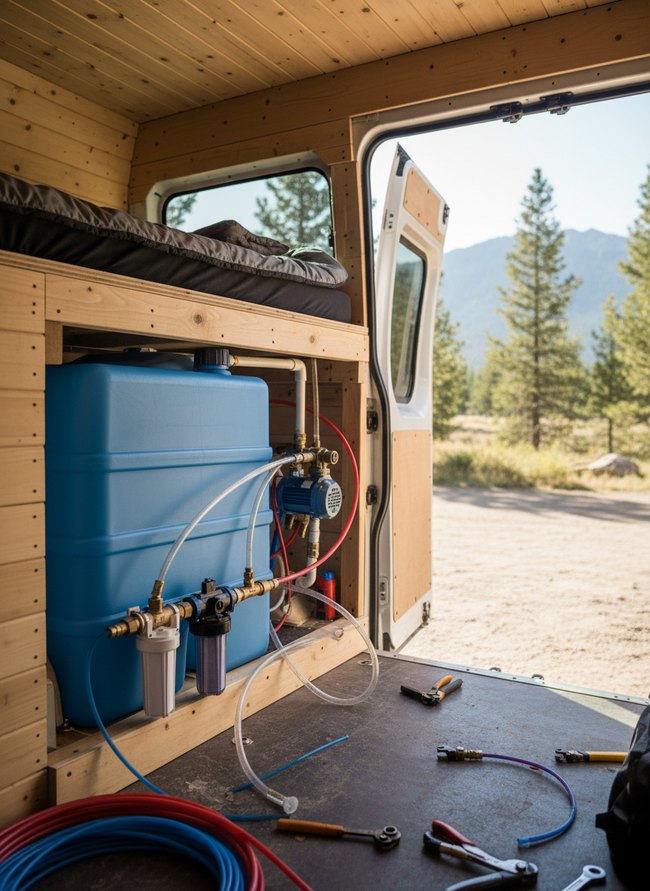
A large blue plastic tank holds the van plumbing system, neatly tucked under a wooden bed frame. Clear plastic tubing and brass fittings connect to a blue water pump and two white and black water filters, showing the system’s careful assembly. Van builders can create a reliable water supply for their own mobile adventures by organizing components in an accessible way.
5. Gray Water Collection Design
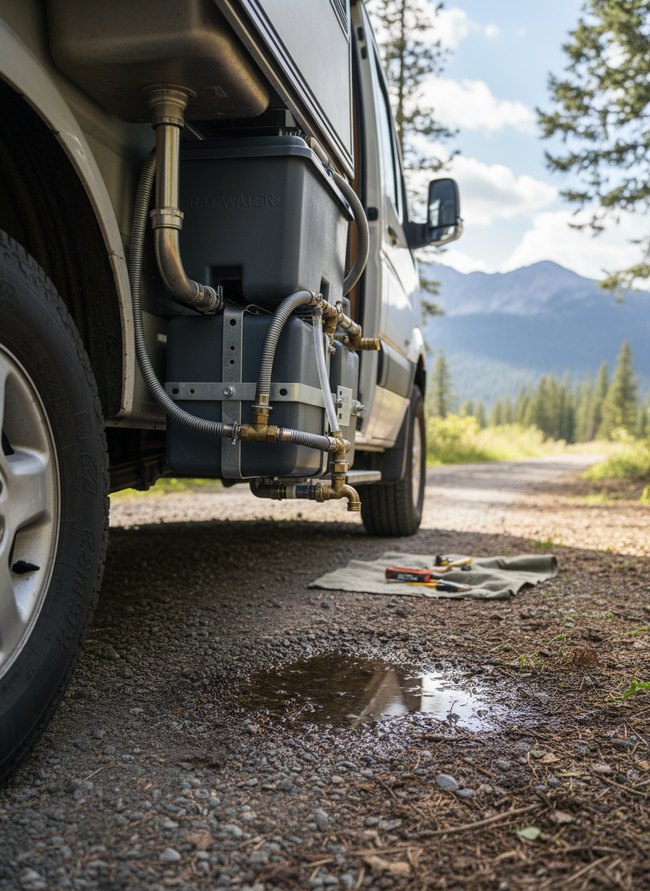
A gray water tank mounts securely under a white van, connected by flexible corrugated hoses and shiny brass fittings. The compact plumbing system includes two dark plastic tanks, one labeled “GRAY WATER,” held by sturdy metal straps. A small puddle on the gravel road shows how the system drains.
6. Pump And Filter Assembly
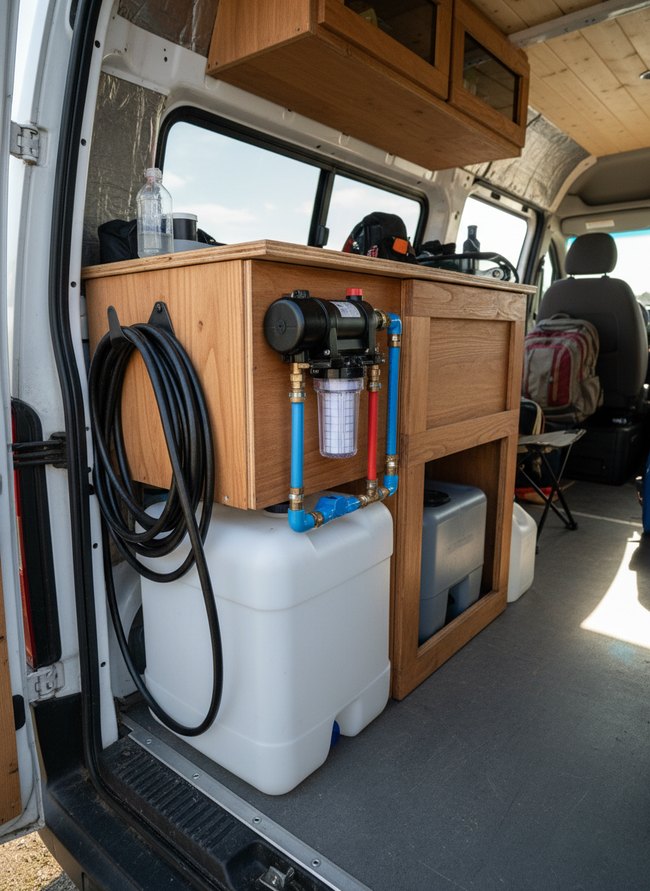
A black water pump and clear filter assembly mount to a light wooden cabinet inside the van. Red and blue PEX pipes connect the pump to a white water tank below, forming a compact van plumbing system. Integrate the water storage with other cabinetry for a clean, unified look.
7. Heated Water Flow
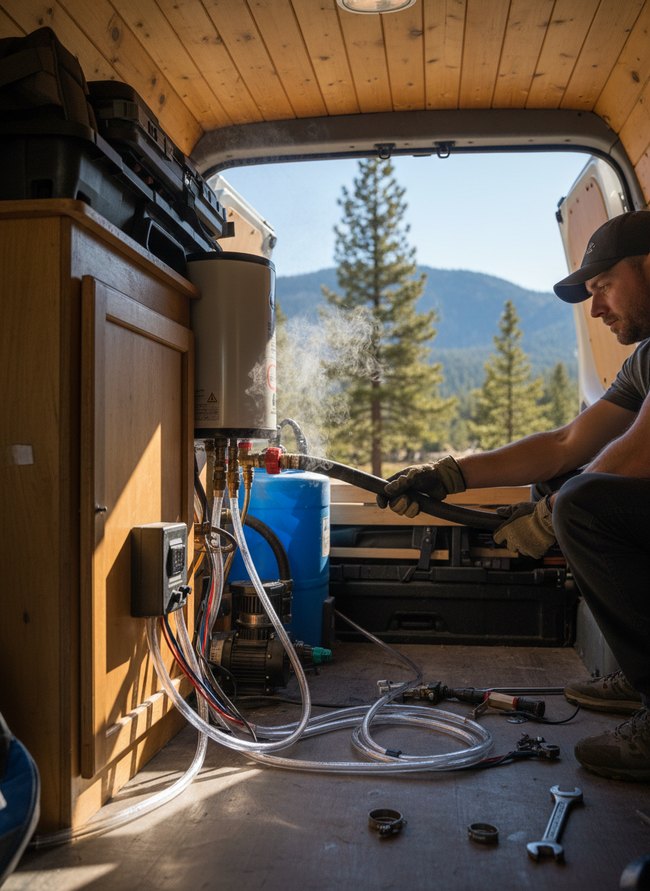
A tall, gray water heater stands mounted on the warm wooden cabinet inside the van. Clear plastic tubing connects to brass fittings on the bottom of the heater, forming part of a functional van plumbing system. A compact water heater can bring comfort to mobile adventures.
8. Portable Water Jug Connect
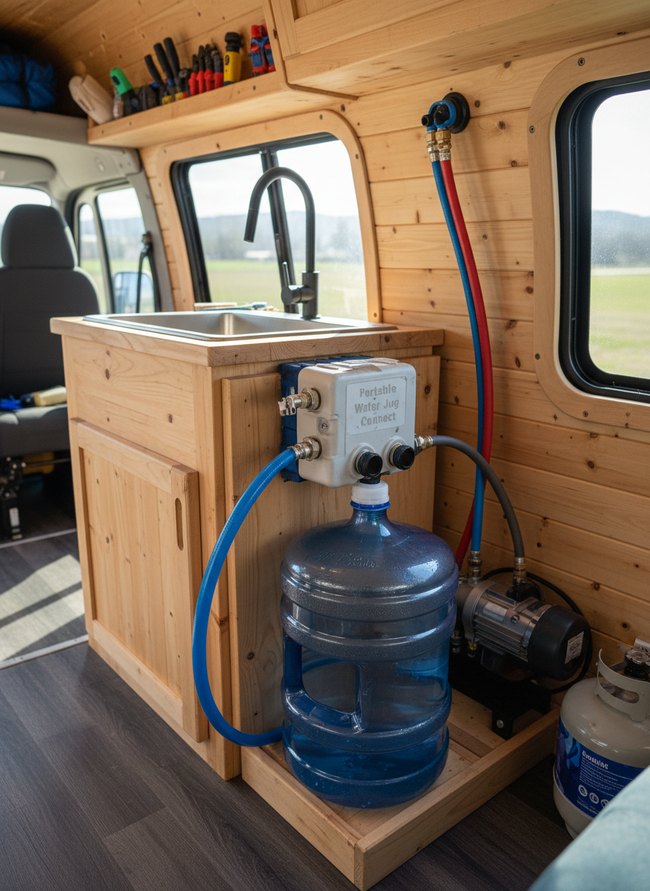
A clear five-gallon water jug connects to a gray pump control box on the light wooden cabinet. Bright blue and red water lines run from the box up to the dark metal faucet above the silver sink. The plumbing system offers a simple way to bring running water into your mobile space.
9. Minimalist Faucet Hookup
A polished chrome faucet sits atop a light wooden countertop, connecting to a blue plastic water tank below. Gray flexible hoses and a black water pump create a functional van plumbing system underneath the counter. Consider using a simple tank and pump setup for your own mobile water needs.
10. Sink Drain Management
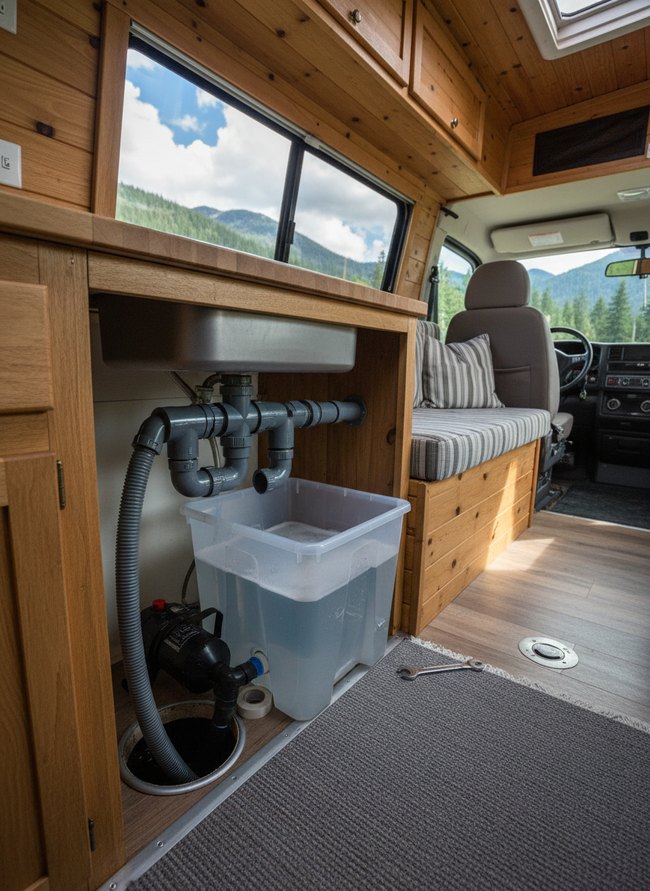
A stainless steel sink drains into a clear plastic container through gray PVC pipes, showing a simple van plumbing system for wastewater. The black electric pump sits beside the clear container, ready to move greywater from the van. Van builders can easily manage sink drainage by installing a similar setup.
11. Winterized Van Lines
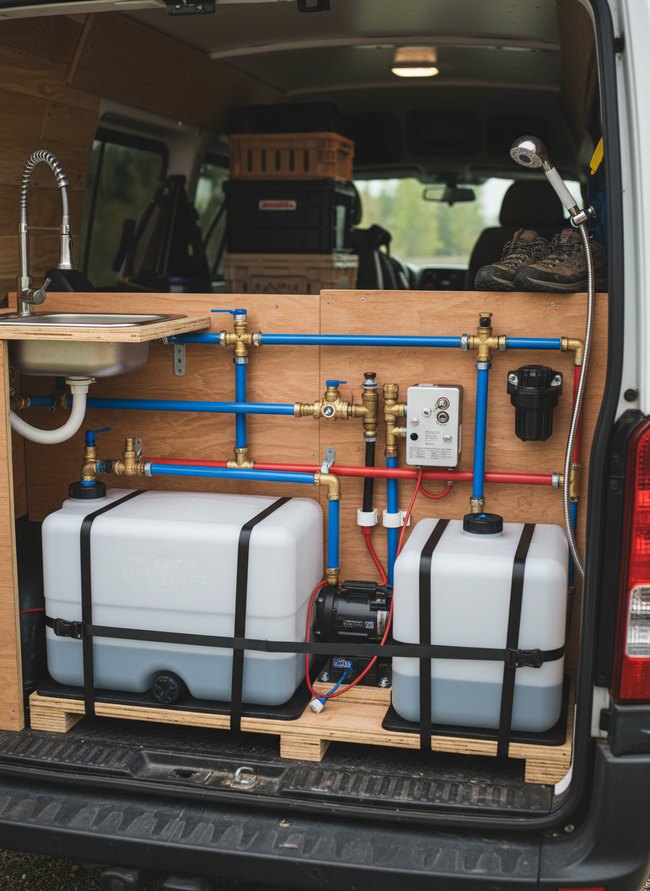
The van’s rear displays a complex plumbing system, neatly installed with wooden panels and two white plastic water tanks. Bright blue and red PEX pipes run across the light plywood, connecting the tanks to brass fittings and a small stainless steel sink. The water pump and filter are clearly visible, showing how a compact setup still offers full functionality for the vehicle.
12. Multi-Point Water Distribution
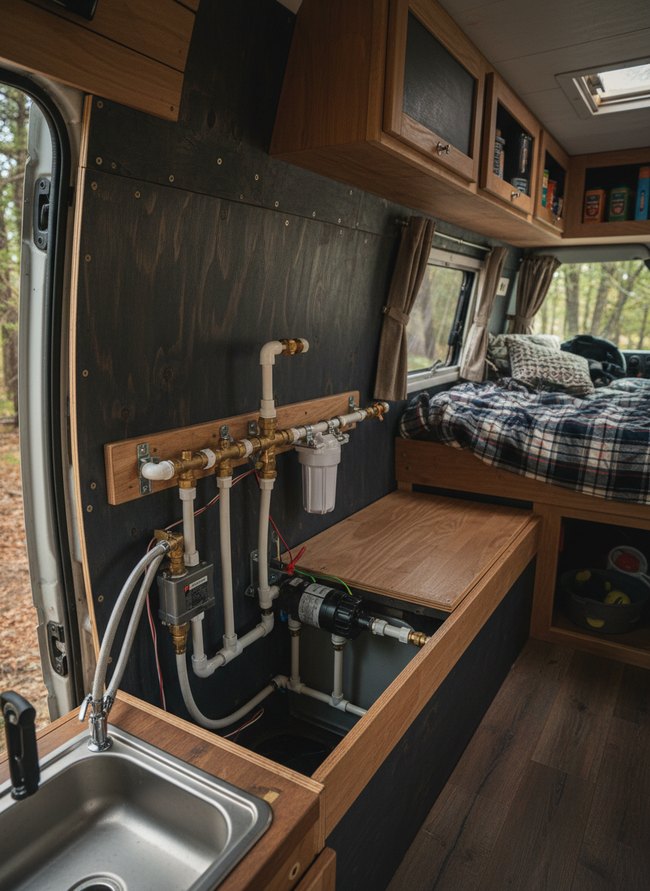
White PVC pipes and shiny brass fittings create a compact van plumbing system on the dark plywood wall. A white water filter and a black water pump connect to the pipes, distributing water to the small stainless steel sink. Designers should integrate water storage tanks for easy access and maintenance.
Sizing Your System: How Much Water Do You Really Need?
Daily water use surprises many newcomers. Your drinking water needs about one gallon per person each day. Cooking and dishwashing add another two gallons for each person. A quick shower uses around three gallons. Consider your personal habits for accurate planning. Laundry requires substantial water, perhaps five gallons per small load. A grey water tank collects used water. Its size should match your fresh water tank. You will empty the grey water tank often. Black water tanks hold toilet waste. They usually hold smaller volumes. A five gallon black water tank often lasts two days. The van plumbing system needs tanks for each type of water. Proper sizing prevents frequent refills.
Winterizing Your Van’s Plumbing: Preventing Freezes and Cracks
Propylene glycol, a non-toxic pink antifreeze, safeguards your van’s plumbing from harsh winter conditions. Your freshwater tank needs complete draining before you introduce any protective fluid. Remove the drain plug from the bottom of the gray water reservoir. Each water heater bypass valve requires careful adjustment. The bypass setting will prevent antifreeze from entering your hot water tank. Then, a small hand pump pushes the rosy liquid through your cold water lines. Open every cold water faucet until pink liquid flows out. Do not forget the showerhead. Flush the toilet until pink fluid fills the bowl. Repeat this exact process for the hot water system. Remember, a gallon of this specific antifreeze typically protects a standard van setup. Insulation sleeves, made from gray foam, wrap around exposed pipes underneath the vehicle. These black foam tubes, secured with thin zip ties, offer another layer of cold resistance. Your water pump also needs protection. Drain the water pump completely. A small amount of antifreeze can then trickle through the pump’s intake. This whole process takes less than an hour.
Which Idea Will You Try First?
That’s 12 different takes on van plumbing system. The best ideas above are usually the smallest moves — one material, one layout shift, one piece of furniture in the right place. Pick whichever room feels closest to your space and start there before tackling the rest.
Found an idea worth keeping? Save this post to your Pinterest board so it’s waiting for you when you’re ready to start your own project.