How to Install a Van Electrical System for Beginners
Many online guides for a van electrical system miss the crucial first step. Other guides often jump straight into wire gauges and battery types without showing the big picture. Building a solid electrical system requires understanding how each component fits into the larger puzzle. Each numbered step below shows the correct sequence for installing your powerful system. We break down the complex parts into simple, manageable actions, ensuring your mobile dwelling gets reliable power. You will discover the proper order, from initial planning to flicking on your overhead light.
1. Simple Solar Panel Hookup

Plywood wall paneling provides a clean, easily modified surface for mounting electrical components. The simple design integrates the solar charge controller, the deep-cycle battery, and a power outlet onto one flat wooden plane. Black and red electrical wires connect the core elements of the van electrical system, creating an organized arrangement. The efficient vertical stacking provides a simple solar panel hookup.
2. Basic Battery Bank Setup
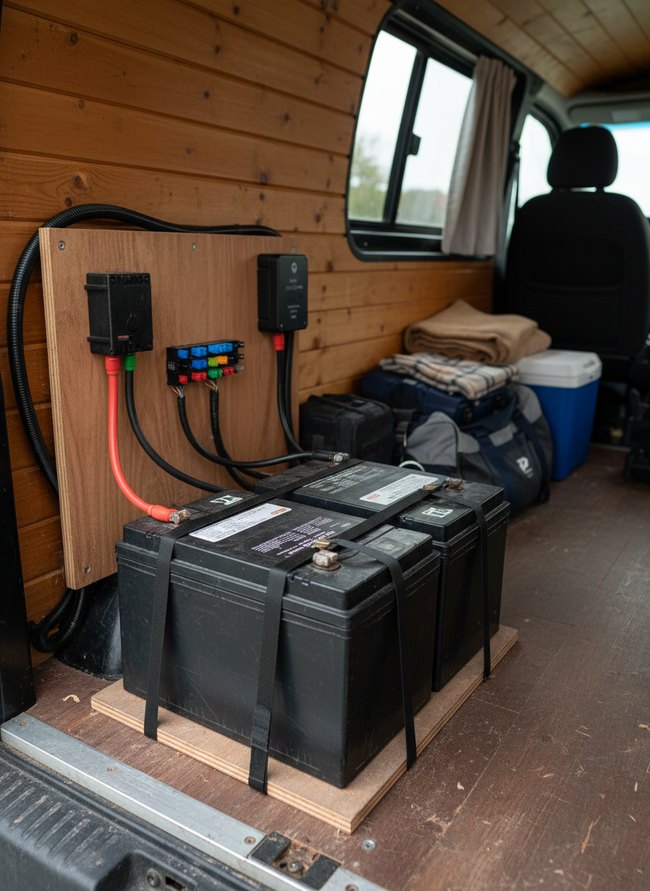
A clever wood panel mounting board organizes the van’s electrical system. The board gathers black electrical boxes and a colorful fuse block onto a single, accessible surface for wiring. Black nylon straps secure two large black batteries to a light brown plywood base, preventing movement inside the vehicle. The neat, functional arrangement is a move worth stealing.
3. Fuse Block Integration Guide
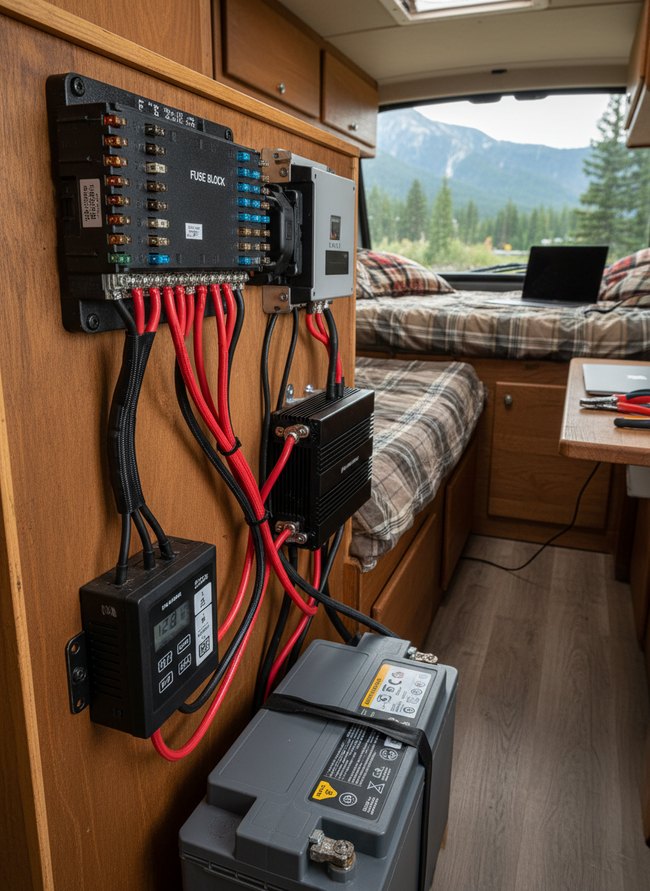
Mounting all primary electrical components to a single wooden panel creates a clean, organized van electrical system. The arrangement keeps all wiring runs short, which reduces voltage drop and simplifies troubleshooting. Black cable sleeves neatly bundle the red and black wires, contributing to a tidy appearance. Group all electrical parts onto one panel for easy access and maintenance.
4. Inverter Installation Module
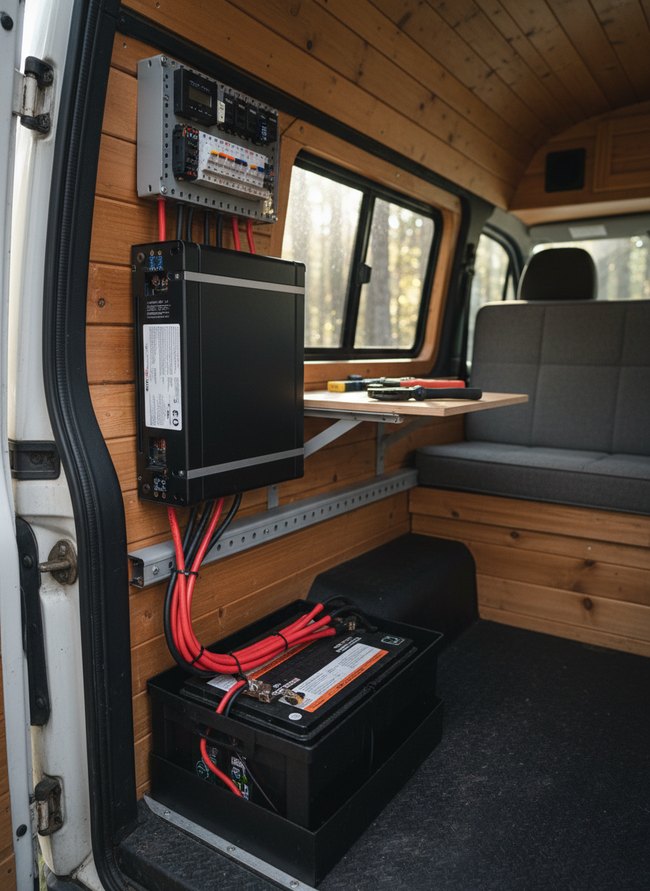
Mounting the components vertically on a light pine wall saves floor space inside the narrow van. Red and black electrical wires connect the black inverter to the battery, creating a functional electrical system. A gray metal bracket holds a small wooden table, offering a handy workspace. The vertical mounting strategy maximizes space in any small area.
5. Wiring Diagram Blueprint
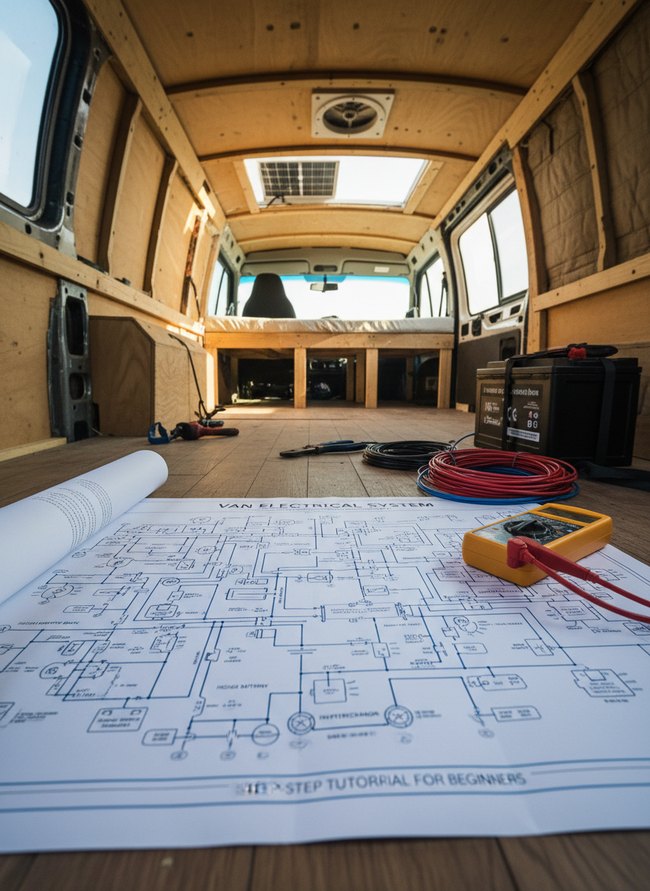
A large paper blueprint showing a van electrical system diagram lays flat on the warm wooden floor. The visual guide simplifies complex wiring, making it easy to follow each connection for your build. Red and black electrical wires sit coiled beside a black power battery, ready for installation. A clear wiring diagram blueprint is the smartest move for any beginner.
6. Starter Circuit Assembly
A plywood mounting board provides a sturdy, flat surface for the starter circuit assembly. The wood panel creates an organized base for all black electrical components and bright red and black wires. Thick black batteries, secured with a yellow strap, sit beneath the panel, connected to a black inverter unit on the dark floor. A simple wood board can mount van electrical system components cleanly.
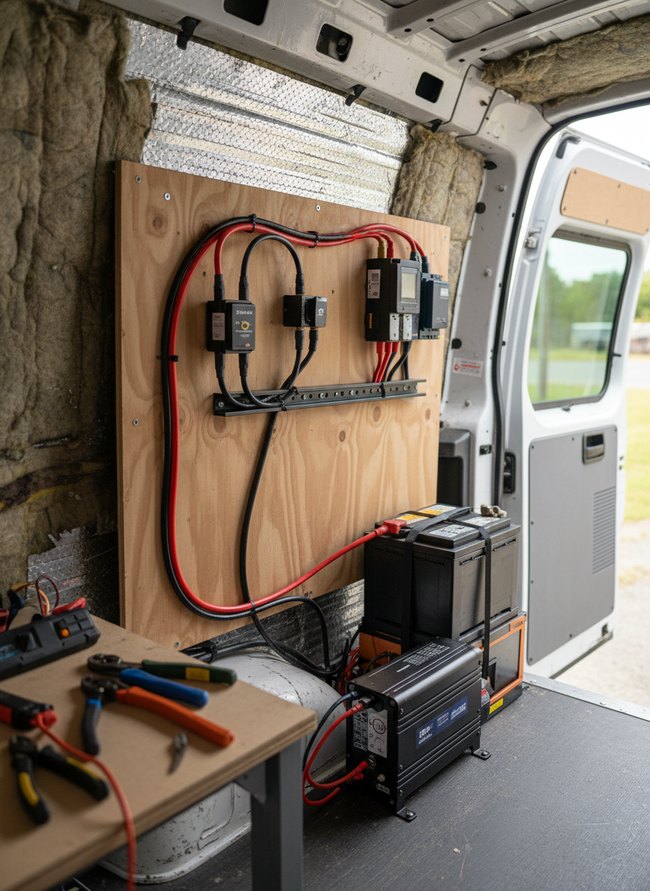
7. Charge Controller Mount
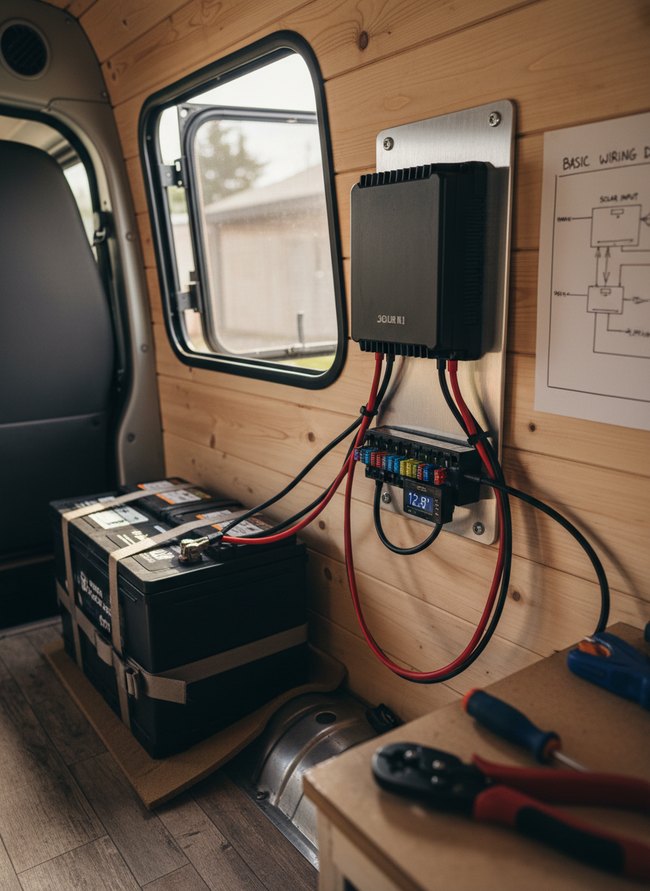
A silver metal mounting plate creates a clean, organized base for the black charge controller and fuse box. The plate keeps essential components of the van electrical system neatly arranged on the honey-toned wood plank wall. Red and black wires connect the devices, securing with black zip ties. A simple metal plate mounts all small electrical components.
8. Grounding System Connection
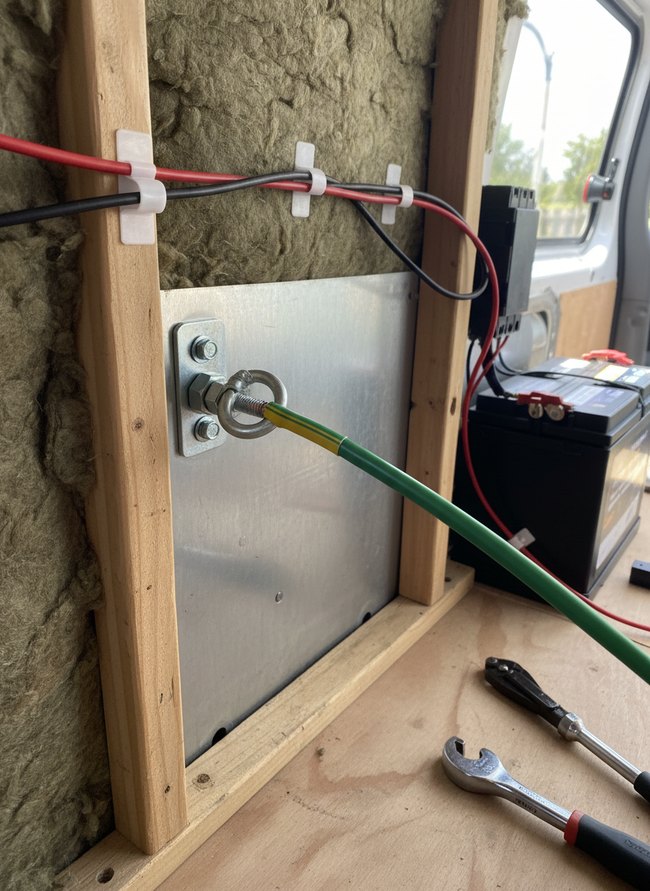
The green and yellow striped wire connects directly to the metal plate, ensuring a secure electrical ground for the van’s electrical system. The robust attachment prevents loose connections and potential electrical issues. White plastic clips hold red and black wires neatly along a wooden frame, demonstrating careful cable management. A large metal eye bolt provides a strong, reliable attachment point for the green ground wire.
9. Shore Power Inlet

The yellow power cord extends from the white van, visibly connecting to the shore power inlet. The bright yellow cord clearly shows the flow of power to the van electrical system. A black circular hatch covers the electrical connection on the van’s side. The move involves choosing high-contrast colors for the electrical system components.
10. Appliance Power Distribution
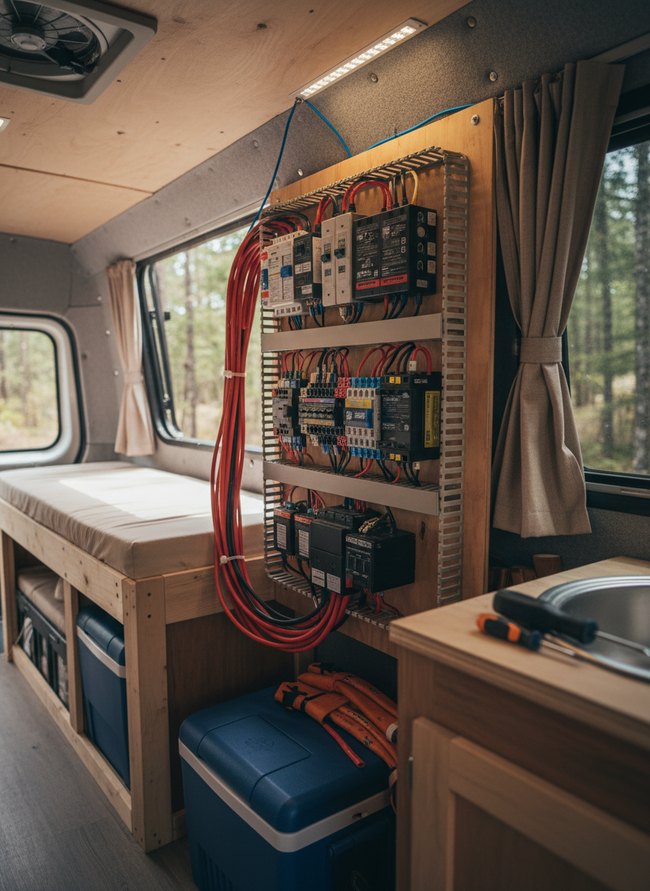
A light brown wooden panel provides a clear, organized display for the van electrical system. Black circuit breakers and red heavy-gauge wires are neatly arranged, making troubleshooting easy. A simple beige curtain hangs on a nearby window, offering privacy. Direct mounting of components on a single wooden board is a clever design choice.
11. LED Lighting Circuit
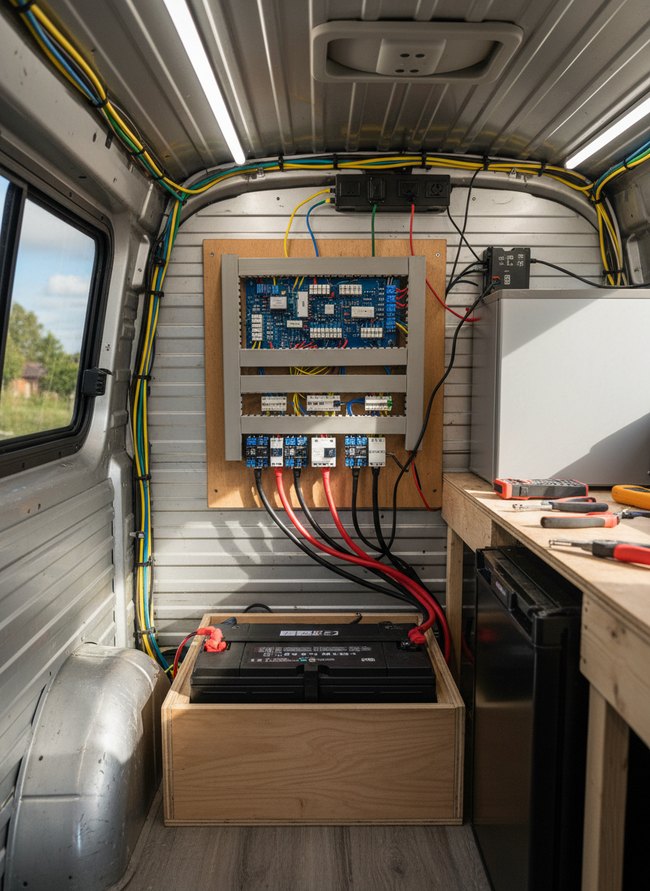
Exposed conduit routing for the van electrical system highlights the practical wiring path. Clear placement of yellow and green cables along the corrugated metal wall shows a deliberate approach to organizing the LED lighting circuit. A gray framed panel displays the blue circuit board, neatly housing the electrical components. Consider exposing utility runs for a clean, functional aesthetic.
12. Beginner Friendly Wiring

The plywood mounting board keeps all components of the van electrical system neatly organized in one accessible location. The layout makes future troubleshooting simple for new users. Black wires run cleanly from the two deep cycle batteries up to the black inverter and charge controller, secured with small plastic clips. Mount all electrical components on a single plywood panel.
The Efficacy of Lithium Iron Phosphate (LiFePO4) Battery Chemistry in Cyclical Deep-Discharge Applications
A LiFePO4 battery offers superior cycle life for daily deep discharges within a van electrical system. Your twelve-volt refrigerator, a power-hungry appliance, draws down battery levels each night. Lead acid batteries, a common alternative, degrade quickly under such regular deep depletion. Instead, modern lithium iron phosphate cells endure thousands of deep cycles, maintaining usable capacity over many years. This robust chemistry translates into fewer battery replacements and more reliable power for your off-grid adventures. Choosing the correct battery technology prevents inconvenient power outages when you are miles from a charging station. A cheap flooded lead acid battery might save initial cash, but its short lifespan costs more in the long run. The durable internal structure of LiFePO4 cells handles frequent charging and discharging with minimal stress. This long-term resilience ensures your van’s electrical power remains consistent, whether you are running a small fan or charging camera gear.
Optimizing Charge Controller Algorithms for Multi-Source DC Input Integration
Charge controller algorithms must manage multiple power sources carefully. Many van electrical systems gather energy from both rooftop solar panels and the engine’s alternator. A single charge controller typically handles these distinct power flows into your deep cycle battery bank. For instance, a Morningstar MPPT controller with a multi-input feature intelligently prioritizes the most efficient charging method at any given moment. This smart programming prevents overcharging your battery, a common pitfall with poorly designed systems. Some cheap controllers simply dump all available power into the battery, causing unnecessary heat and shortening its lifespan. Proper algorithms adjust current and voltage continuously, safeguarding your expensive lithium iron phosphate cells. The controller shifts power delivery, making sure every joule of energy benefits your mobile home. Advanced units even allow custom programming for different battery chemistries, which offers superior protection. Ignoring this sophisticated control risks significant damage to your power storage.
Which Idea Will You Try First?
That’s 12 different takes on van electrical system. The best ideas above are usually the smallest moves — one material, one layout shift, one piece of furniture in the right place. Pick whichever room feels closest to your space and start there before tackling the rest.
Found an idea worth keeping? Save this post to your Pinterest board so it’s waiting for you when you’re ready to start your own project.