How to Convert a Van into a Camper: Step-by-Step Guide
A cramped apartment with concrete walls can feel like a cage after a long week. The same four walls start to close in, leaving you dreaming of wide open roads and tall pine trees. The longing for adventure, for waking up with sunlight streaming through a back window, sits deep in your bones. You want a mobile home, not another hotel room with a tiny soap bar. Building your own road-ready sleeping space offers true freedom, a sturdy escape from the everyday grind. The guide walks you through every plank of wood and every copper wire needed for your own rolling sanctuary. We show you how to convert a van into a camper, from an empty metal shell to a functional living space.
1. Stripped Interior Prep Phase
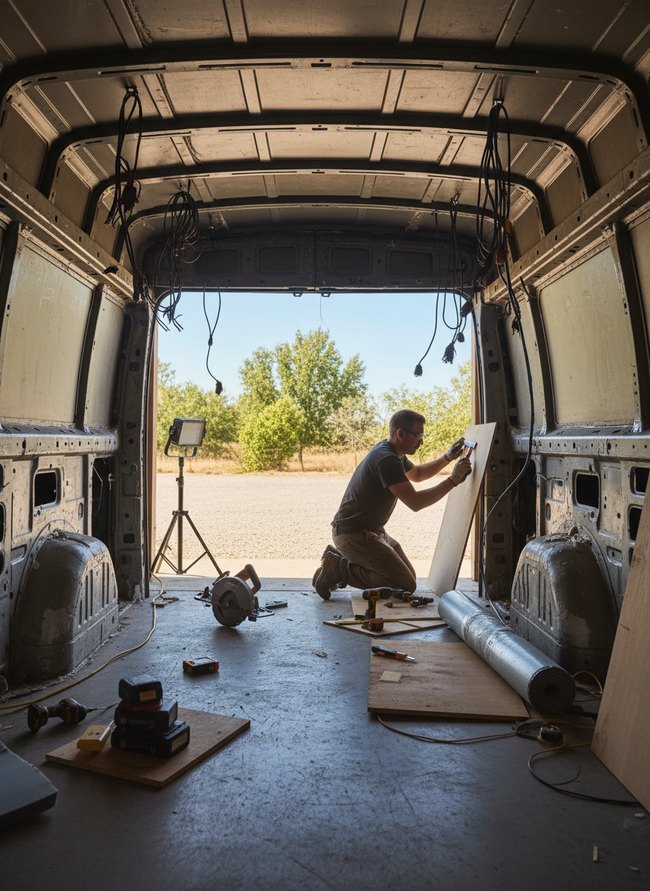
A worker kneels inside the stripped metal shell of a large cargo van, carefully trimming a light wooden panel to fit the interior. Electrical wires hang down from the gray ribbed ceiling, ready for future connections in your custom camper project. Tools like a circular saw and a roll of silver insulation material lie on the dark gray floor, showing the early stages of a full conversion.
2. Insulation Panel Installation
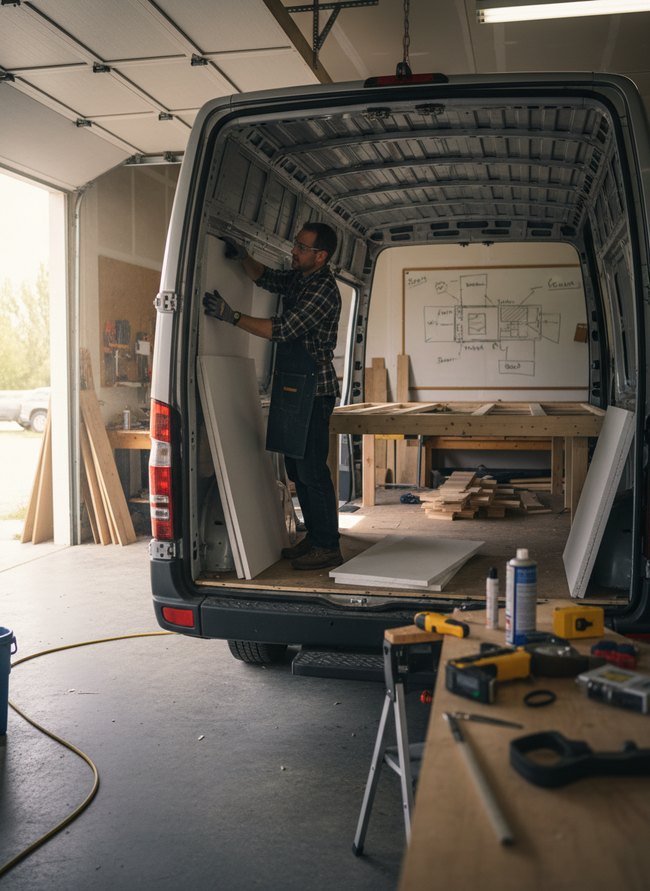
A man in a plaid shirt carefully fits a white insulation panel into the bare metal frame of a large gray van. Various tools and wooden planks are scattered around the concrete garage floor, indicating ongoing construction of the custom camper conversion. A whiteboard with a hand-drawn layout shows the planned interior for the vehicle.
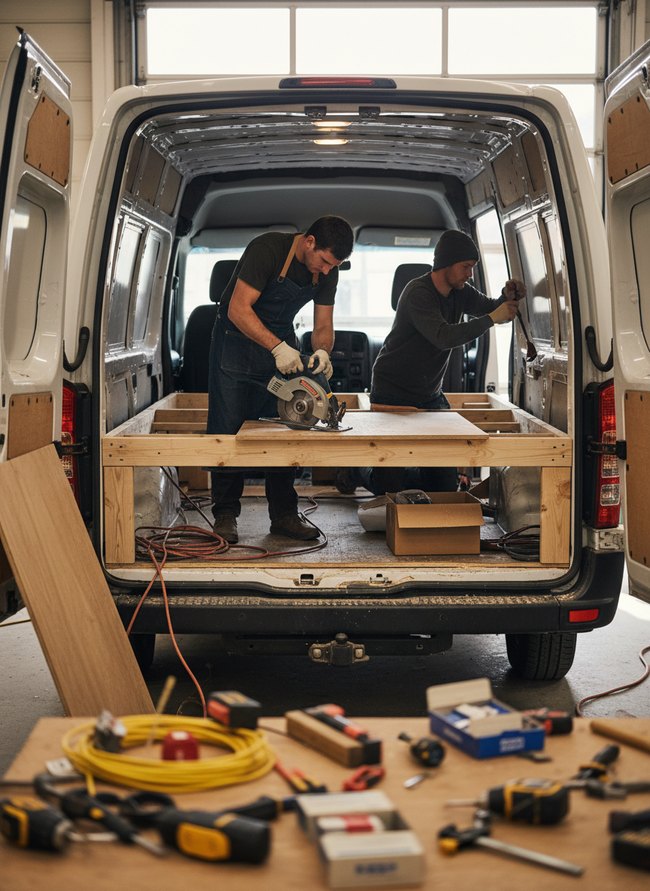
3. Subfloor And Flooring Laying
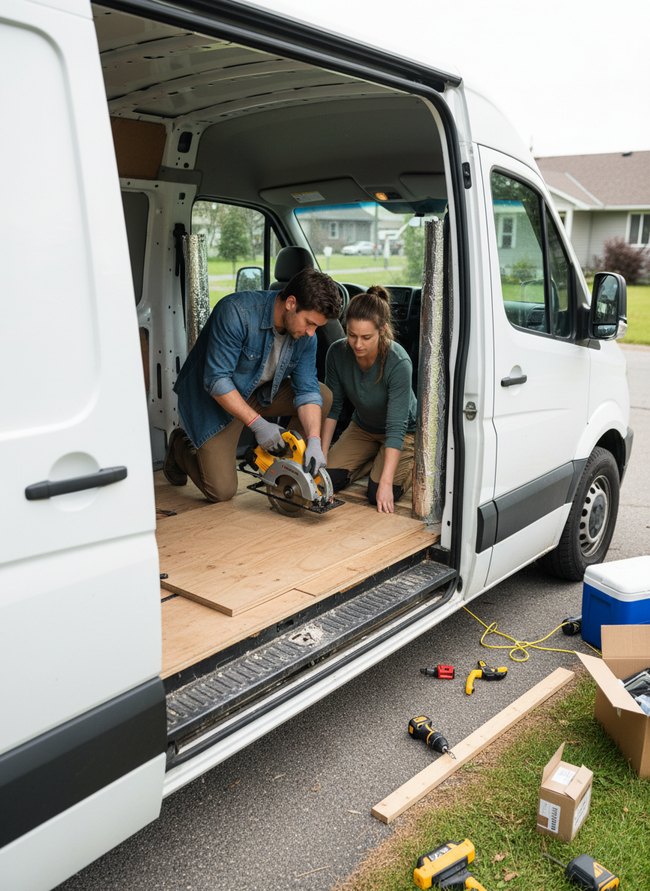
A craftsman uses a bright yellow circular saw to precisely cut a piece of light brown plywood inside the cargo area of a white van, preparing the subfloor for your new camper. His partner kneels nearby, carefully guiding the wood panel into position. The crucial step in the van conversion shows you how to build a solid foundation for your mobile living space.
4. Wall Panel Framing
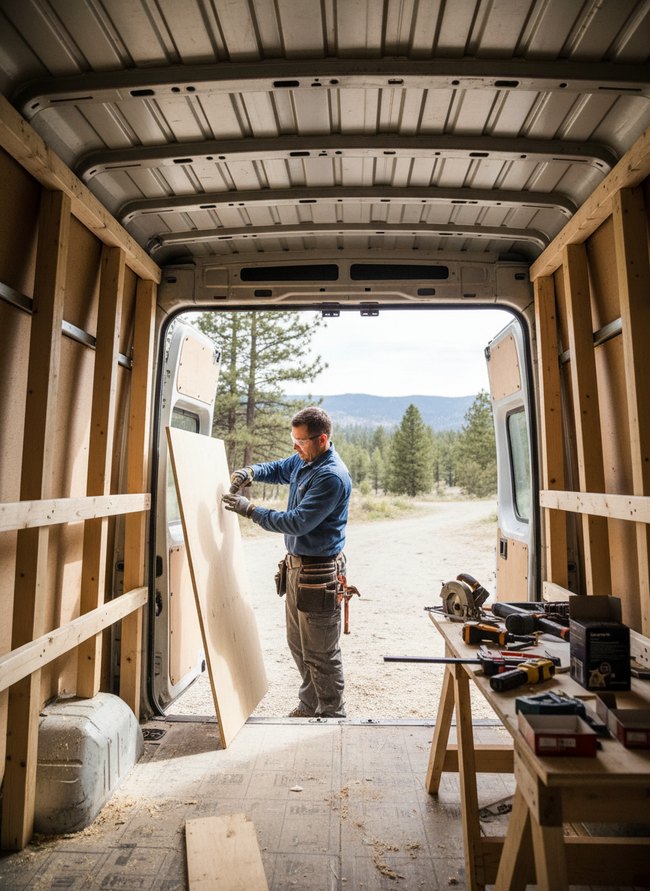
A man in a blue shirt works inside the cargo area of a silver van, installing a light tan plywood panel against the exposed wood framing. Raw lumber studs create a robust interior structure, providing attachment points for wall panels in the new camper. The image clearly shows how to convert a van into a camper by building out the wall panel framing.
5. Ceiling Fan Venting
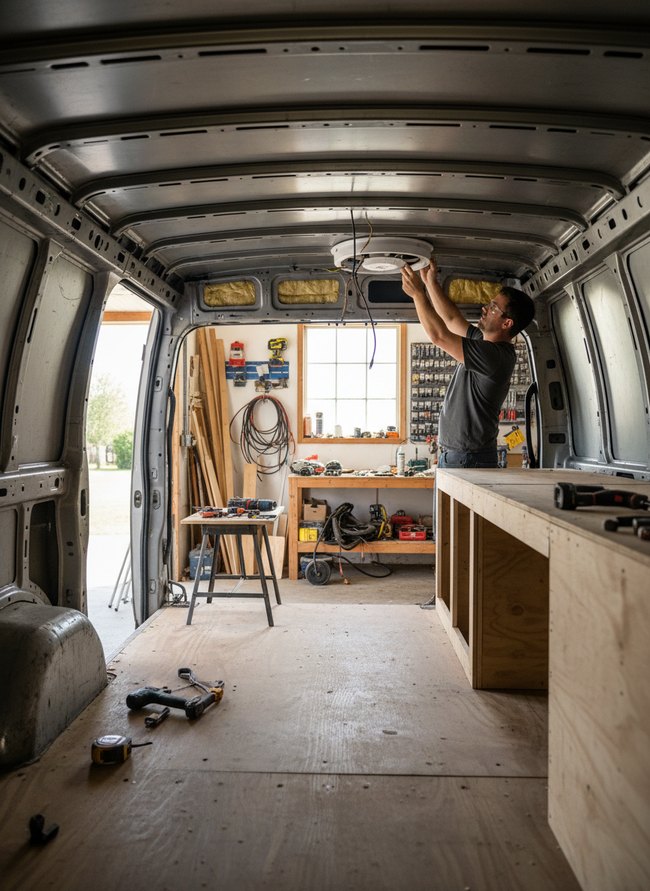
A man in a dark grey shirt installs a white circular ceiling fan into the metal roof of a large cargo van. Yellow electrical wires hang freely from the fan opening, ready for connection to the van’s power system. Plywood sheets cover the van’s floor and form the beginnings of a wooden counter along the right side, creating a functional space for a camper conversion.
6. Electrical System Wiring
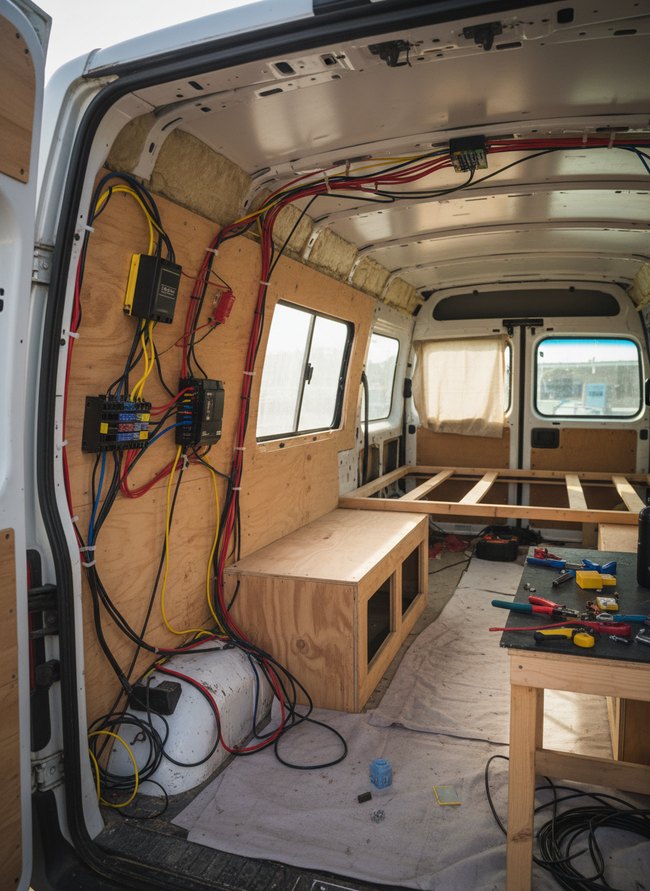
Bright red, black, and yellow electrical wires run across the van’s pale plywood wall panels. Two black charge controllers manage power flow from solar panels, mounted securely to the light wood. The electrical system demonstrates how to convert a van into a camper with an efficient, organized setup.
7. Plumbing Water System
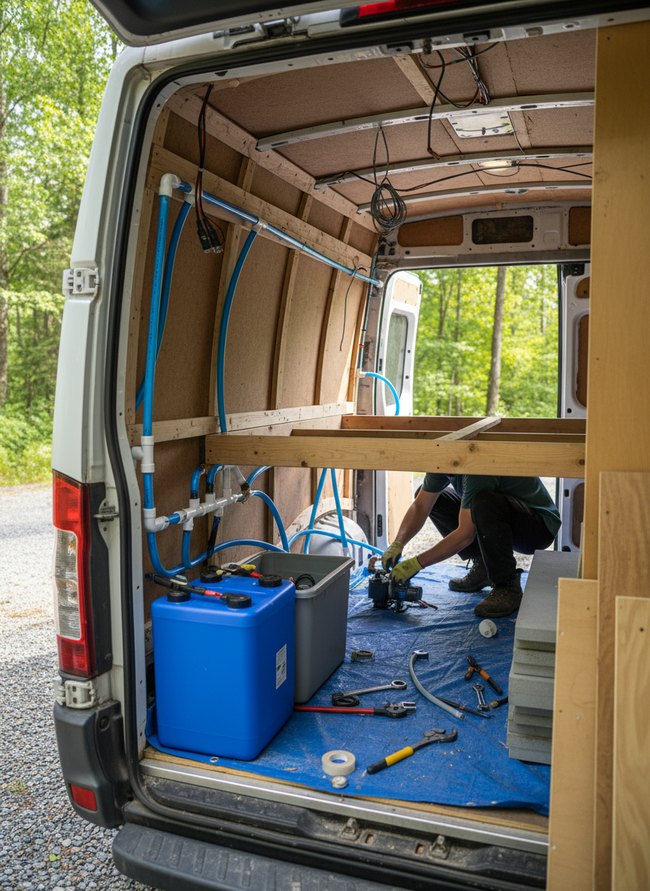
A bright blue water tank sits on a blue tarp, ready for connection. Light blue PEX tubing runs along the van’s wooden walls, carrying water to different parts of the camper. A person works on a dark water pump, ensuring the plumbing system functions properly.
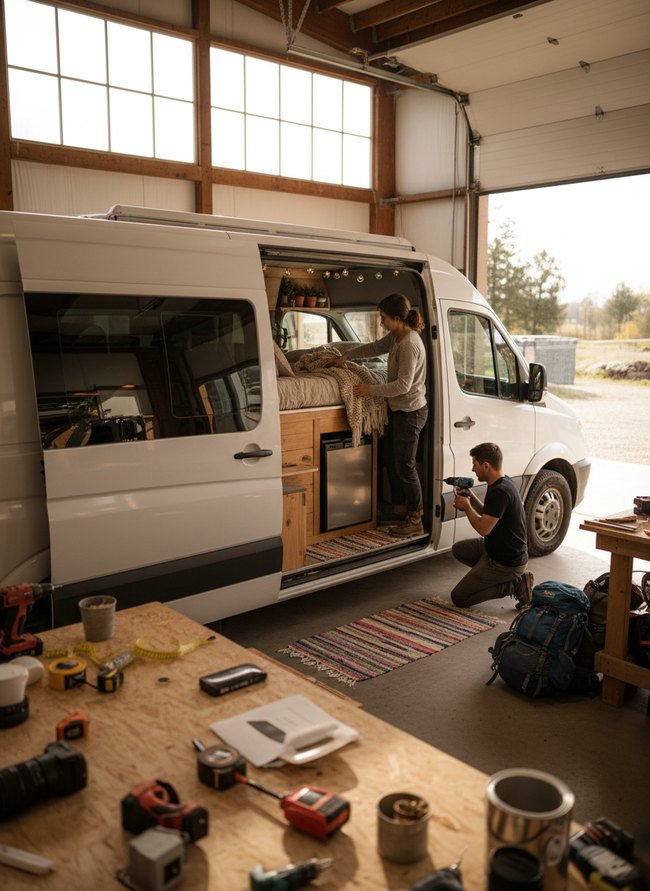
8. Custom Cabinetry Building
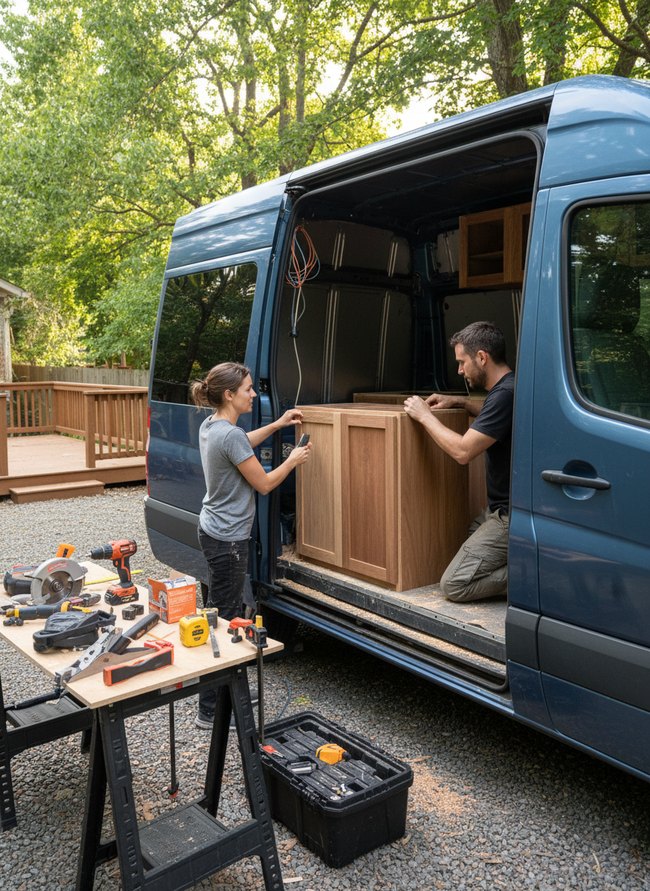
A blue van with an open side door reveals two people fitting a honey-toned wooden cabinet into the cargo area. The male figure kneels inside the vehicle, adjusting the large wooden box, while the female figure stands outside, holding a measuring tool against the frame. The custom cabinetry converts the van into a camper.
9. Bed Platform Construction
Two craftsmen build a wooden bed platform inside the rear cargo area of a white van, demonstrating a van-to-camper conversion. One man uses a circular saw to cut a light brown wood panel, carefully shaping the sleeping surface. A second man works on the rear wall paneling, preparing the interior for finished surfaces. The clear setup shows how to construct a sturdy bed frame for a van conversion.
10. Compact Kitchenette Setup
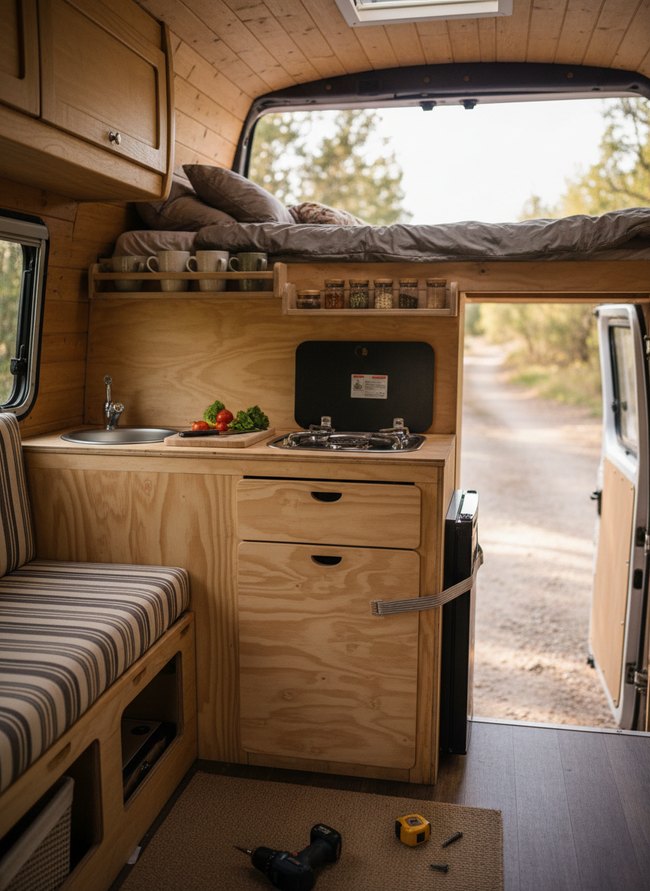
A compact wooden kitchenette fills the side of the camper van, offering essential cooking and cleaning tools for your travels. A small stainless steel sink sits beside a portable gas stove with two burners, giving you options for meal preparation. The wooden counter and overhead storage shelves provide ample space, showcasing how to convert a van into a camper effectively.
11. Seating Area Creation
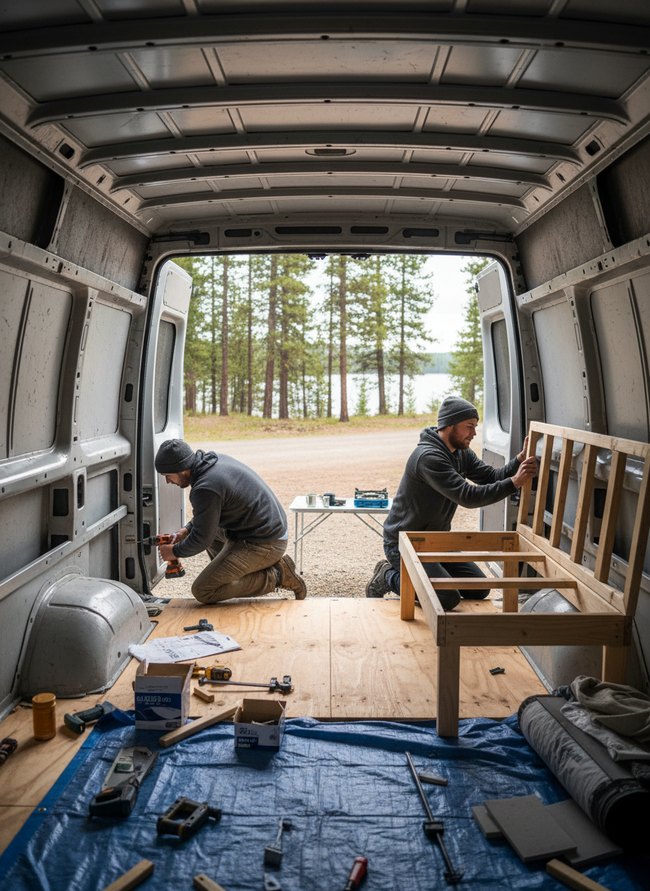
Two men kneel inside a white utility van, actively constructing interior elements for a custom camper conversion. One man drills into the metal van wall, creating anchor points for a new mobile living space. The other man positions a light wooden frame, forming the base of a cozy seating area within the vehicle. The step demonstrates the hands-on work involved in transforming a bare cargo van into a functional camper.
12. Final Decor Touches
The converted van interior features warm wooden cabinetry and a comfortable bed, offering cozy living space. A silver mini-fridge sits neatly below the bed, providing cold storage for your travels. Colorful string lights and small potted plants add a personalized, homey touch to the camper conversion.
Beyond the Beautiful Build: Don’t Forget the Legalities, Registrations, and Insurance
…many builders skip the paperwork completely. Converting your cargo van means updating its title for proper legal standing. A new RV title prevents big fines from police who stop you. Your current auto insurance policy will not cover a converted camper van. Insurance companies require specific policies for homemade RVs because standard car insurance excludes custom modifications. You need special RV coverage for fire damage or road accidents involving your new living space. Contact your state’s Department of Motor Vehicles immediately after your build finishes. Different states have unique requirements for self-contained vehicles, like a fixed toilet or an onboard water tank. Ignoring these small details leaves you uninsured for major repairs. Some states demand a small kitchen sink; others want a permanent bed frame. You must check local laws to avoid registration problems down the road. Every small detail protects your financial investment in the wheeled dwelling.
The Silent Killers: Mitigating Moisture, Mold, and Condensation in a Small Space
…fresh air prevents moisture from settling on cool metal walls. Every van needs a proper ventilation system; you stop black mold from growing by moving damp air outside. First, install a roof fan, a twelve-volt ceiling unit pulls warm wet air out fast. This simple fan keeps your small home much drier. Many folks think thick insulation alone stops condensation, but a fluffy fiberglass batt cannot remove water vapor from breath or cooking steam. Instead, insulation slows heat transfer, making surfaces less cold. Cold surfaces attract airborne moisture, forming tiny water droplets. A vapor barrier, a thin plastic sheet placed under interior wall panels, blocks water vapor from reaching the cold metal shell. You must tape all seams of the plastic film. Small gaps in the barrier let humid air slip through. Cooking creates a lot of humidity; open a window or run your fan while boiling water. Drying wet clothes inside makes your van a humid sauna. Hang dripping clothes outside or at a laundromat. A small dehumidifier, a compact electric appliance, also pulls excess water from the air. You empty a small tank of collected water daily. These actions keep your living space healthy and free from fuzzy green patches.
Which Idea Will You Try First?
That’s 12 different takes on how to convert a van into a camper. The best ideas above are usually the smallest moves — one material, one layout shift, one piece of furniture in the right place. Pick whichever room feels closest to your space and start there before tackling the rest.
Found an idea worth keeping? Save this post to your Pinterest board so it’s waiting for you when you’re ready to start your own project.