How to Organize Your RV for Winter Storage
Dusty camping chairs collect cobwebs in the garage corner. Old sleeping bags lie rumpled in a cardboard box, holding last summer’s memories. A familiar sinking feeling hits hard when cold weather arrives, reminding you of the big cleanup that awaits before parking the recreational vehicle. Muddy boots tracked dirt across the floor, leaving brown streaks. You know the mountain of tasks ahead for proper RV winter storage organization. Winter prep deserves a solid game plan, avoiding cold-weather headaches. A smarter system for putting away the road home will save precious time later. Planning makes spring setup a breeze, readying the big toy for its next adventure.
1. Secure Appliance Winterization Kit
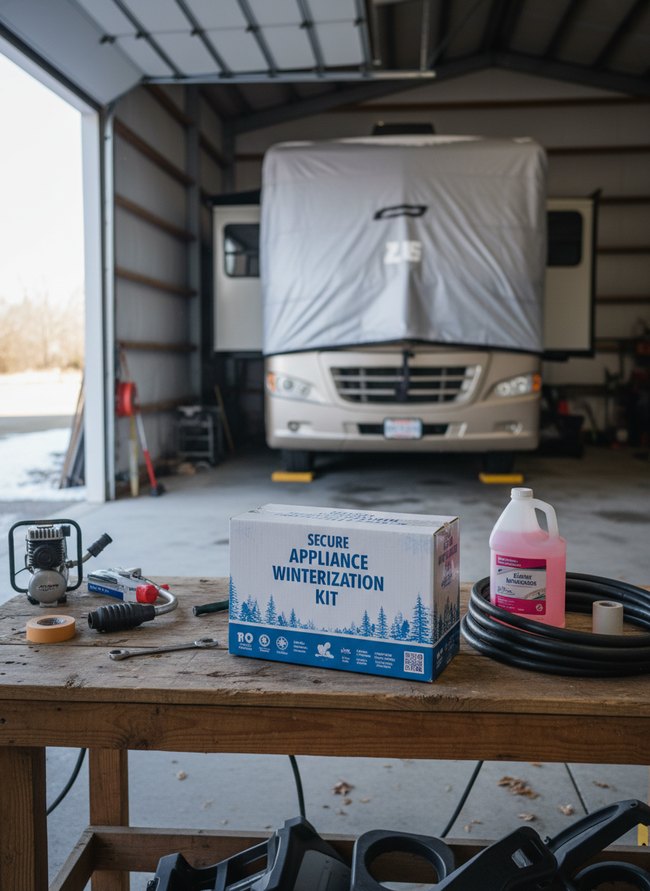
A white cardboard box labeled “Secure Appliance Winterization Kit” sits ready on a rough wooden workbench. A clear plastic jug of pink antifreeze, a black rubber hose, and a small silver air compressor complete the RV winter storage organization tools. The kit ensures RV appliances stay protected from cold weather damage.
2. Exterior Cover Tie-Down

A wide gray winter cover protects the RV’s front, secured tightly with black crisscrossed straps. Four concrete blocks anchor the lower straps, keeping the cover snug against cold winter winds. The heavy-duty system offers excellent protection for winter storage.
3. Underbody Rodent Barrier
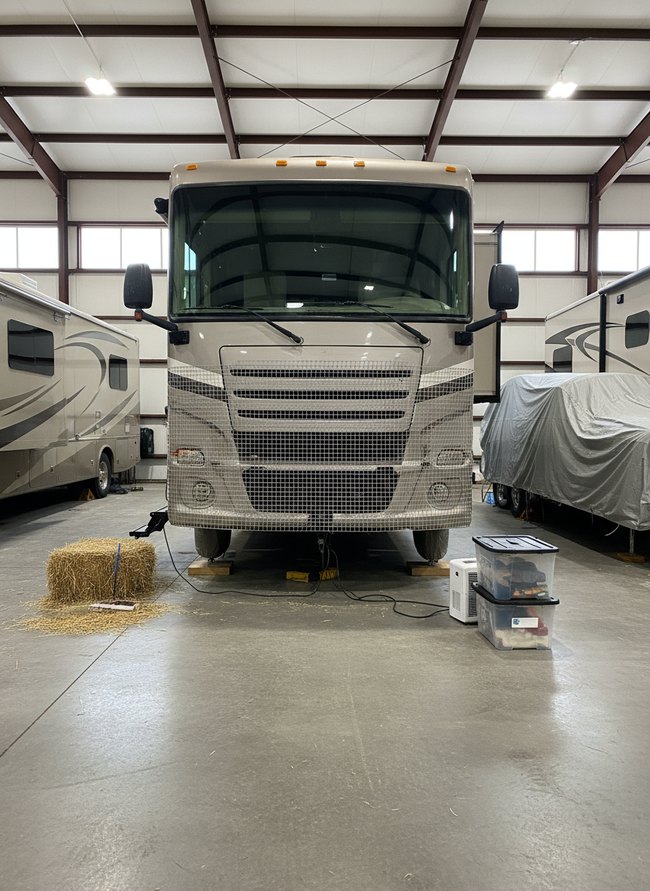
A beige motorhome sits on wooden blocks inside a large concrete building. A light silver mesh screen covers the entire front of the vehicle, from the top of the windshield to the bottom of the grill. The mesh creates a solid barrier, preventing small animals from crawling into the RV during winter storage.
4. Interior Climate Control
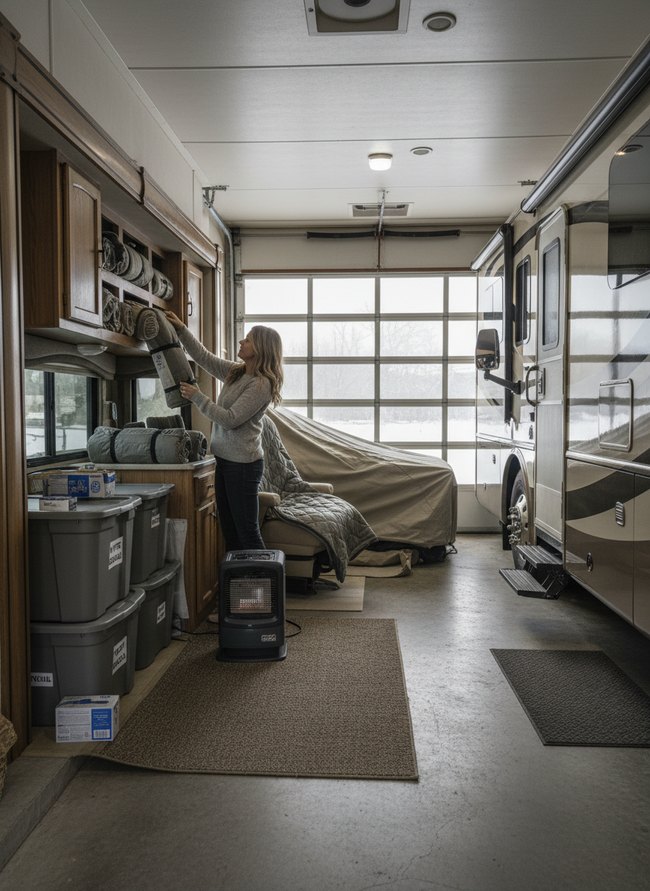
A portable black heater sits on the light gray concrete floor, providing essential warmth to prevent freezing inside the RV. Owners can place the small appliance near the RV’s entrance to circulate warm air effectively. The setup keeps the RV safe and dry during winter storage.
5. Drainage System Winter Guard
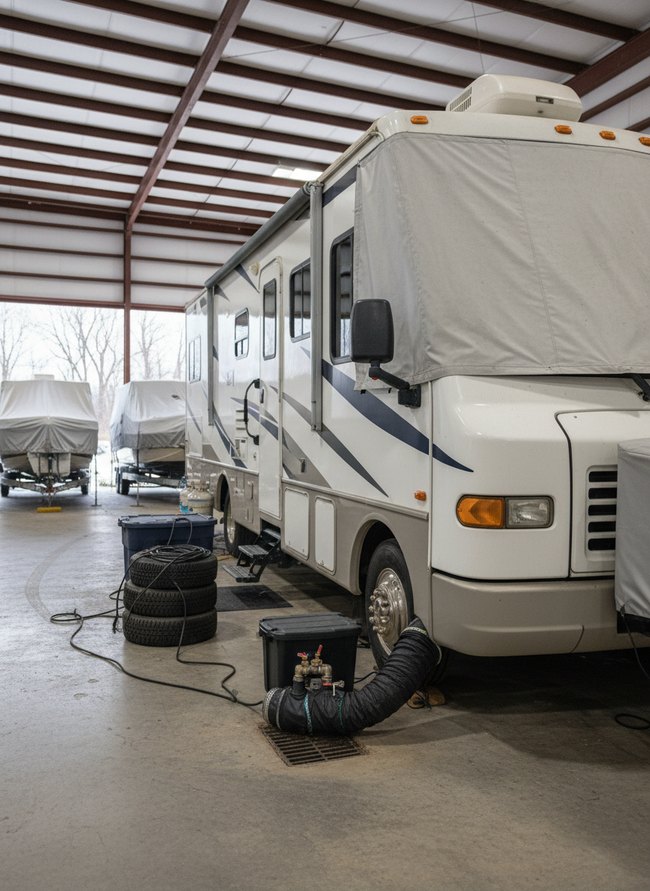
A black corrugated hose connects to a metal drain cover, directing the RV’s water safely away. The clever setup prevents frozen pipes and costly damage during cold weather. The system keeps your motorhome ready for adventure when spring arrives.
6. Tire Block Stabilizers
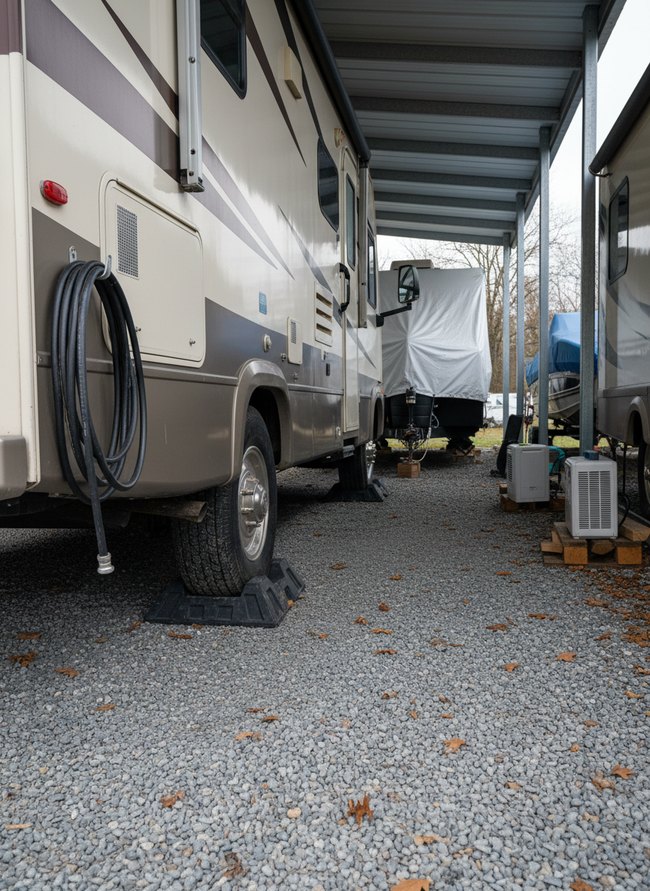
Black rubber tire blocks sit under the RV’s large back wheels, keeping the heavy vehicle from rolling. Gray gravel covers the ground, providing a stable base for the winter storage. The sturdy blocks prevent unwanted movement, securing your motorhome for its long winter rest.
7. Battery Disconnect Station
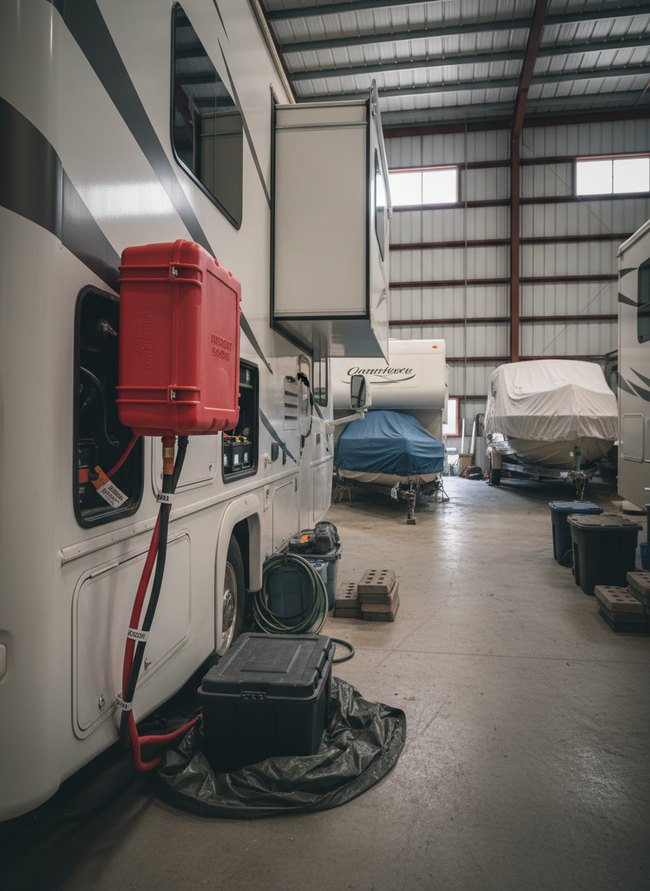
A bright red plastic battery box, clearly labeled, secures your RV’s power system for winter storage. Thick black and red cables run from the box to the white RV’s battery compartment, making power disconnection easy. The organized setup helps keep the RV safe and ready for spring adventures.
8. Moisture Absorber Array
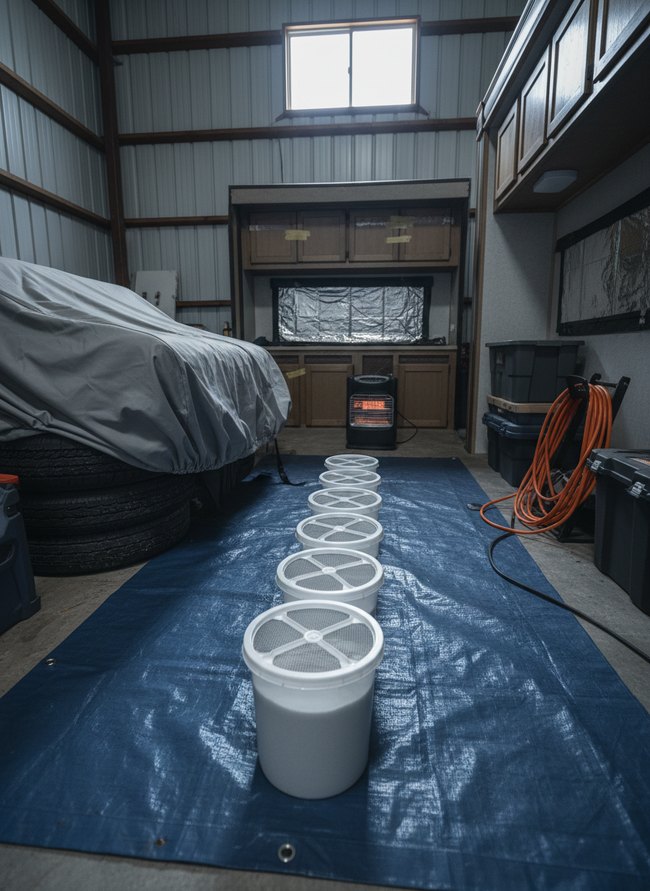
White plastic buckets line a dark blue tarp, catching moisture from the air. Each bucket holds a white moisture-absorbing material with a gray mesh lid. The simple setup keeps your RV dry during winter storage.
9. Engine Bay Protector
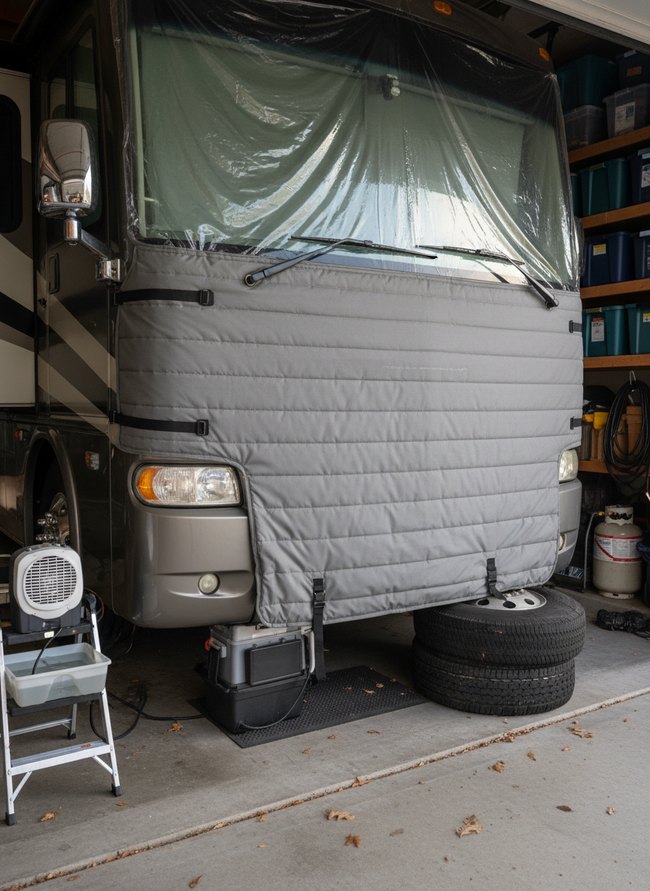
A thick gray quilted cover protects the motorhome’s front, keeping out cold air and small critters during RV winter storage. Clear plastic sheeting covers the windshield, adding another layer of glass protection. The quilted cover includes black straps and buckles to secure it tightly to the vehicle, ensuring a snug fit against winter elements.
10. Ventilation Screen Winterize
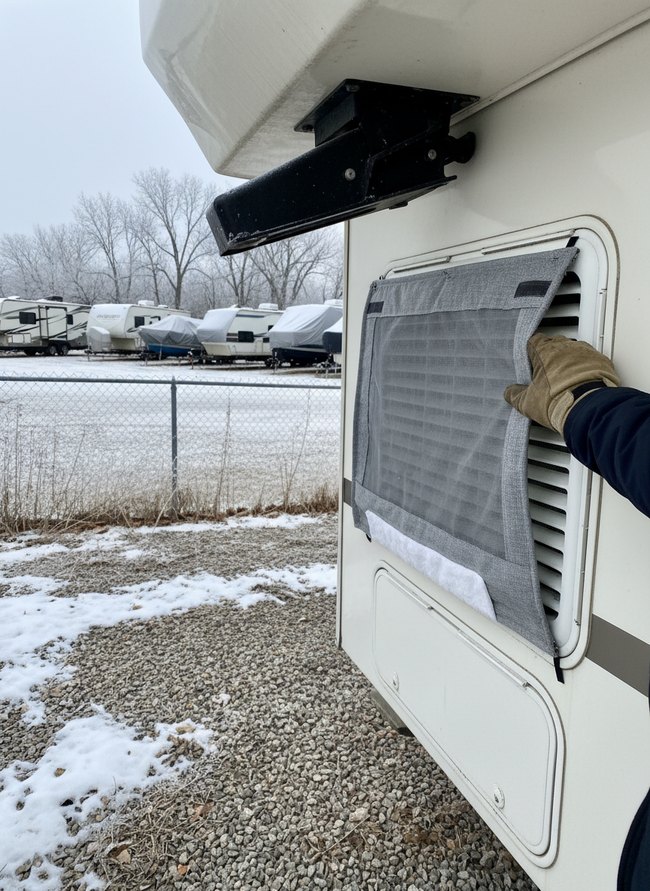
A gloved hand fastens a gray fabric vent cover onto the white RV side panel. The winter cover uses hook and loop fasteners to seal off the ventilation screen opening. The fabric cover keeps cold air and pests out of your parked vehicle.
11. Tank Heater Shutdown
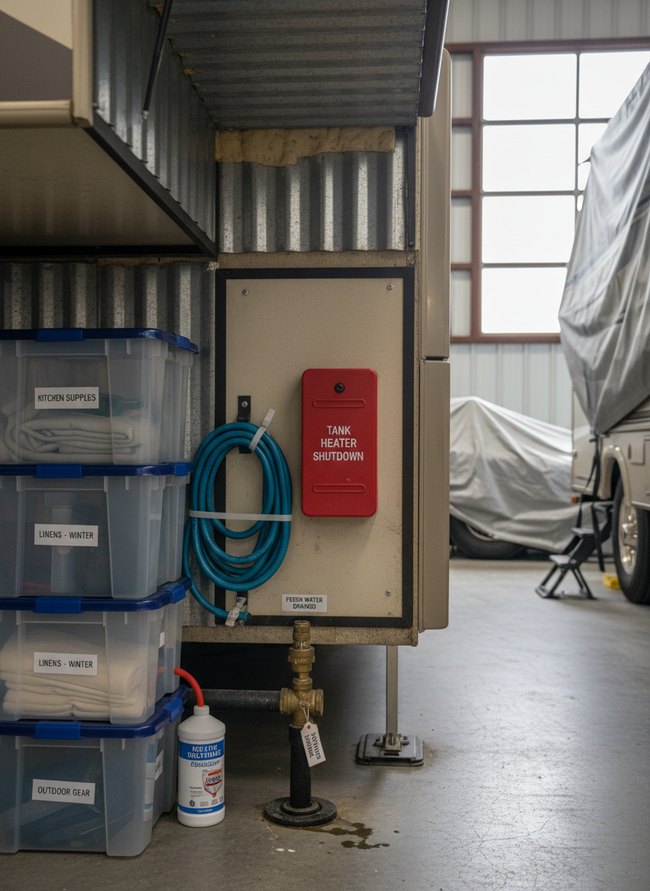
Clear plastic bins with blue lids stack neatly against the RV’s side, holding labeled items like “KITCHEN SUPPLIES” and “LINENS – WINTER.” A bright red “TANK HEATER SHUTDOWN” box stands out on the light beige RV wall, signaling a crucial step in winter storage organization. A brass drain valve with a white tag shows the system is prepared for cold weather. The organized setup makes winterization tasks clear and simple.
12. Slide-Out Support Brace
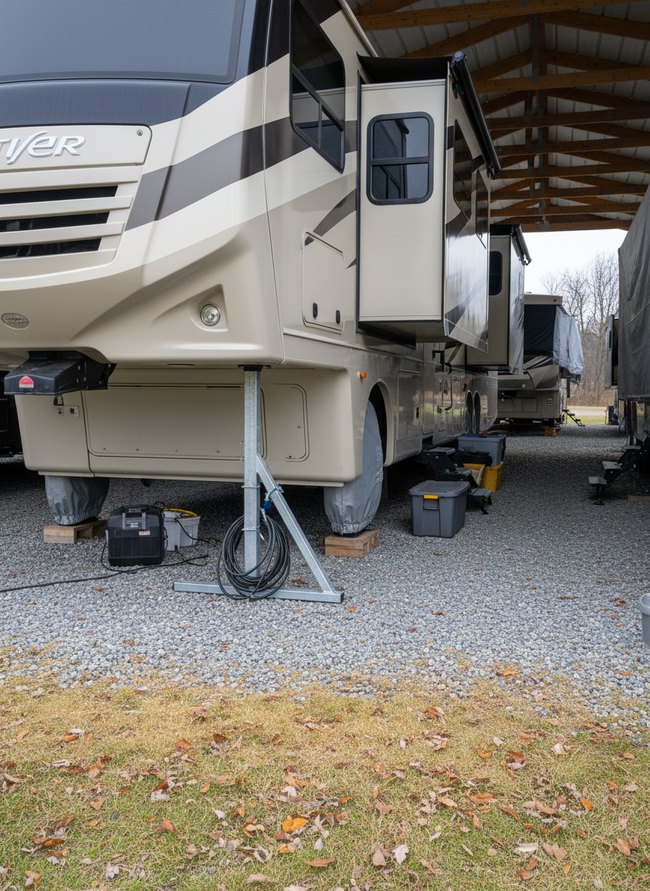
A silver metal brace stands under the front of the beige RV, providing crucial support for RV winter storage organization. The sturdy brace helps prevent stress on the chassis during long-term storage. RV owners gain peace of mind knowing the vehicle remains stable throughout the off-season.
The Overlooked ‘Black Tank’ Flush: Why a Deep Clean Now Saves You Headaches (and Odors) Next Spring
…simply draining your black tank before winter storage is a major mistake, inviting big problems next season. You must perform a deep, thorough flush using a dedicated RV tank cleaner now, preventing hard waste from cementing to the tank walls during freezing temperatures. Many RV owners only dump their tanks. That common advice falls short because solid waste still clings to tank sides, hardening into stubborn layers over cold months. Black tank sensors often stop working properly after winter, giving false readings. A good tank flush dislodges waste particles, letting sensors work right. You also avoid lingering stale odors that fill your RV cabin when warm weather returns. Add a strong enzymatic treatment after the flush. This treatment breaks down any remaining organic matter, stopping foul smells before they even start. Your future self will thank you for this extra effort. A clean, empty black tank ensures a fresh start next spring, saving you frustrating cleaning tasks later.
Beyond the Basics: Preparing Your RV’s Lithium Batteries for Peak Performance After Storage
…a fully charged lithium battery for months hurts its lifespan; keep each one at a 50% charge before winter storage. Lead-acid batteries prefer a full charge, but your lithium iron phosphate battery wants a different approach. Leaving a lithium cell at 100% for a long time causes chemical stress inside the brick-shaped power source. You want the internal components to relax. A 50% charge puts less pressure on the battery’s internal chemistry, making it last more seasons. Disconnect every battery terminal completely. Simply turning off the battery switch often leaves a tiny power draw that slowly drains the cells over cold months. A tiny draw becomes a dead battery. You must remove the main positive and negative cables from the battery posts themselves. Store the whole power unit indoors, away from freezing temperatures. Cold weather permanently damages the delicate internal structure of a lithium battery. Bring the heavy, rectangular battery inside your heated garage or basement. This simple step protects your investment from irreversible damage.
Which Idea Will You Try First?
That’s 12 different takes on rv winter storage organization. The best ideas above are usually the smallest moves — one material, one layout shift, one piece of furniture in the right place. Pick whichever room feels closest to your space and start there before tackling the rest.
Found an idea worth keeping? Save this post to your Pinterest board so it’s waiting for you when you’re ready to start your own project.